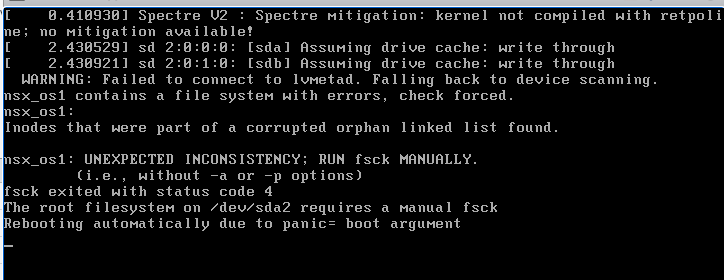
My previous blog described how I was lucky that the Linux filesystem check (fsck) command repaired my critical vCenter server VM which manages my home lab. My VMware NSX-T Manager version 3.1.2 VM also suffered a corrupt file system due to the physical switch failure. This failure halted the appliance. NSX-T is a critical networking infrastructure component in my home lab supporting multiple virtual network segments, routers, and firewalls.
If this was a production deployment of NSX-T recovery isn’t necessary. VMware has made it crystal clear that NSX Manager requires 3 nodes and it is recommended that they are placed on different hosts. These 3 nodes are separate instances of the NSX Manager VM each with a distributed & connected Corfu database. Each node has the same view of the NSX-T configuration and they are always synchronized. NSX-T Manager continues to operate even if one of node fails. However, I only had a single NSX-T Manager node deployed since this is a home lab learning environment. The high availability easy button provided by NSX-T didn’t exist since I didn’t follow VMware’s guidance of deploying 3 nodes. Recovery was necessary for my NSX-T deployment.
NSX-T Manager fsck
I followed Tom Fojta’s “Recovering NSX-T Manager from File System Corruption” blog to recover the NSX-T Manager file system. This was more complicated than repairing the vCenter file system covered in Part 1 of this blog series since the Linux kernel was unable to start due to the root file system corruption.
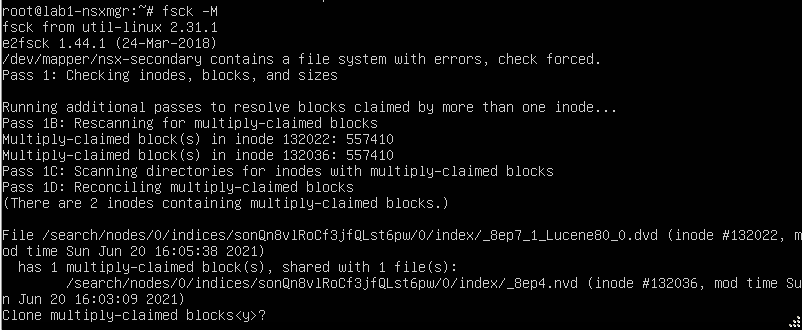
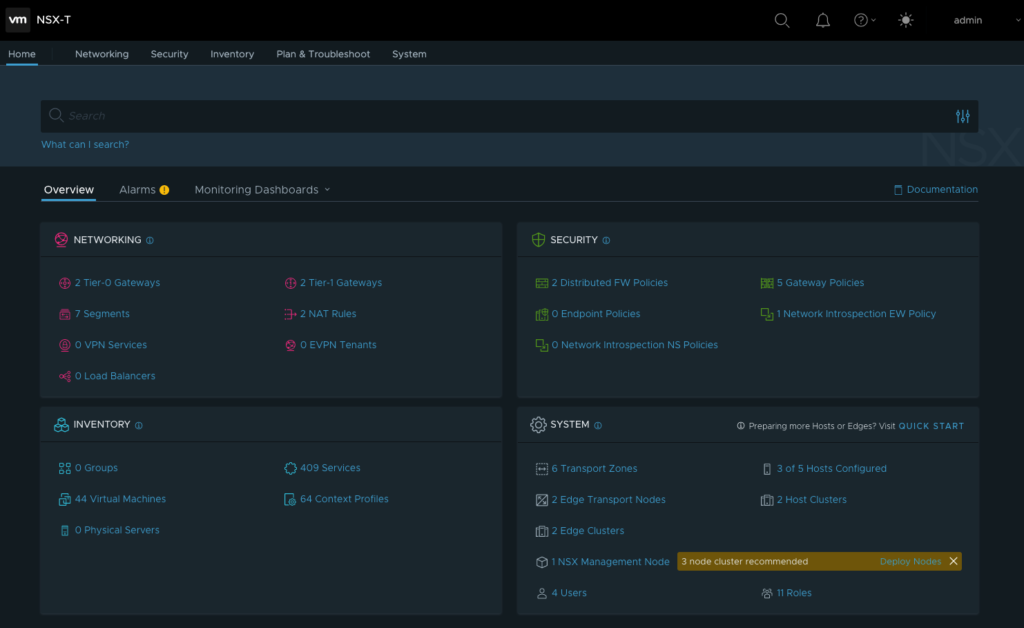
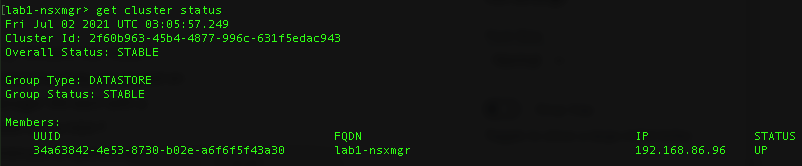
This time recovering the file system didn’t work. Linux successfully booted and NSX-T Manager started. When I checked the NSX-T Manager cluster status the state would remain in the dreaded UNAVAILABLE state. I was hoping to see the output shown below which is from a healthy NSX-T Manager. I reviewed the NSX-T logs but the problem eluded me.
I decided to stop troubleshooting and attempt restoring the NSX-T configuration from my backup.
Restoring the NSX-T Backup
Restoring the NSX-T backup is straightforward. My first step was to start all edge appliance VM’s from the previous deployment. I didn’t find this step documented but after my second attempt I learned that this is the easiest way to restore the entire NSX-T environment. If the edge appliance VM’s are gone or corrupted they can be redeployed from NSX-T manager after restoring the backup.
I keep a OneNote filled with my entire NSX-T configuration including the NSX-T Backup Configuration. The correct parameters and passphrase must be provided to restore a backup. I also keep a copy of the NSX-T Unified Appliance OVA deployed in my home lab. By keeping a copy of the deployed OVA the backup is tied to the same version of the appliance.
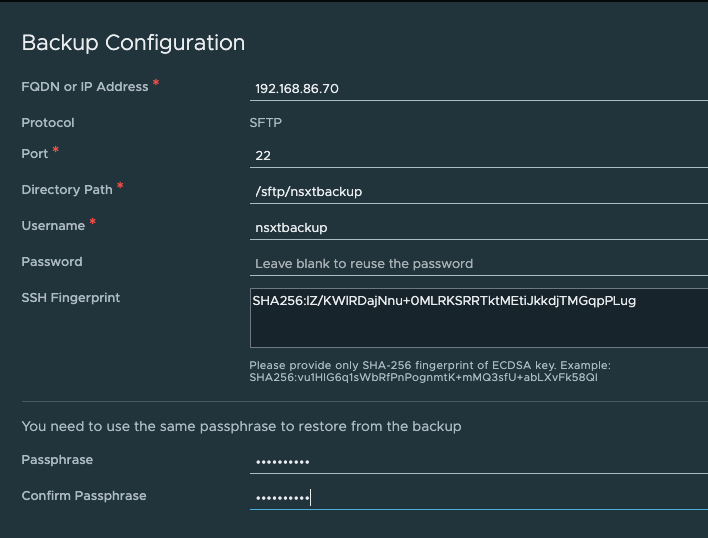
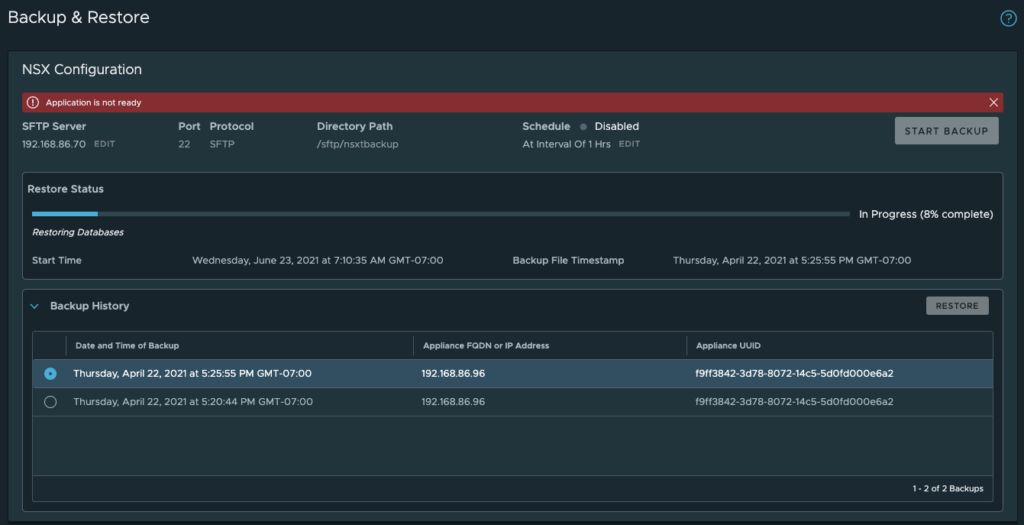
The second step is to deploy the NSX-T Unified Appliance OVA and start the VM. After the NSX-T Manager UI is active, it is necessary to re-enter all of the backup configuration parameters used in the backup. Once the backup configuration is entered, the backups available to restore are shown below.
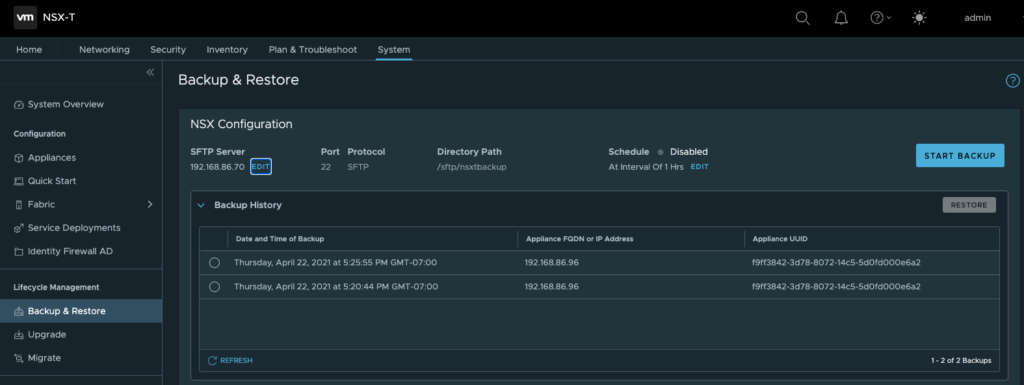
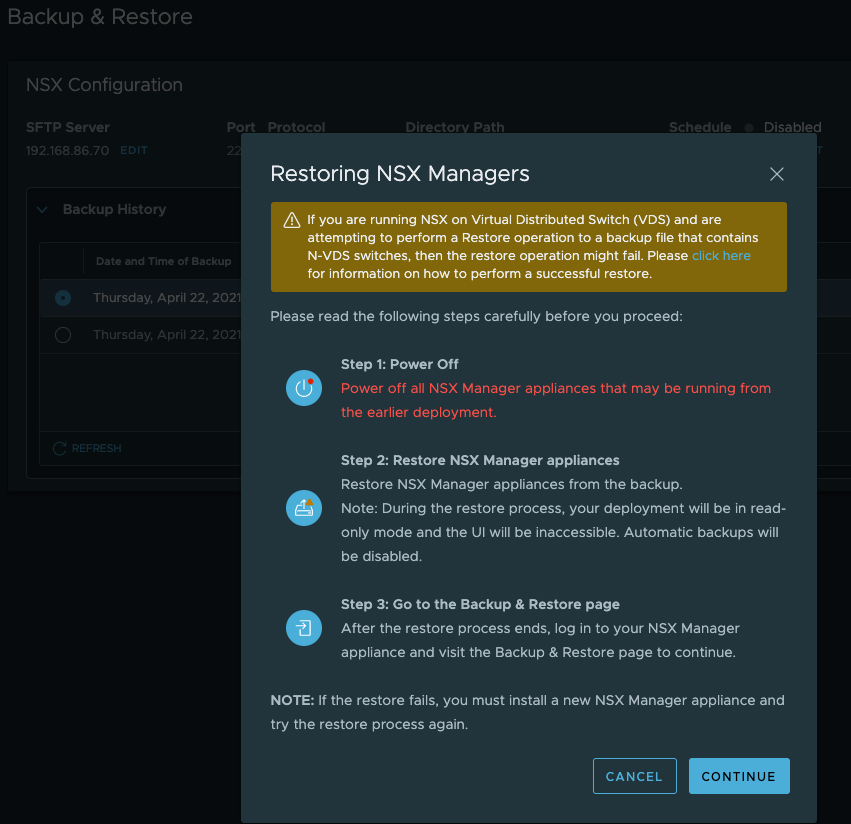
Once the NSX-T backup is selected for restoration the following steps are displayed:
The following restore status is shown with a progress bar.
After the NSX-T Manager UI reboots the following completion message is displayed. Total restore time was 42 minutes where I only had to watch the progress unfold.
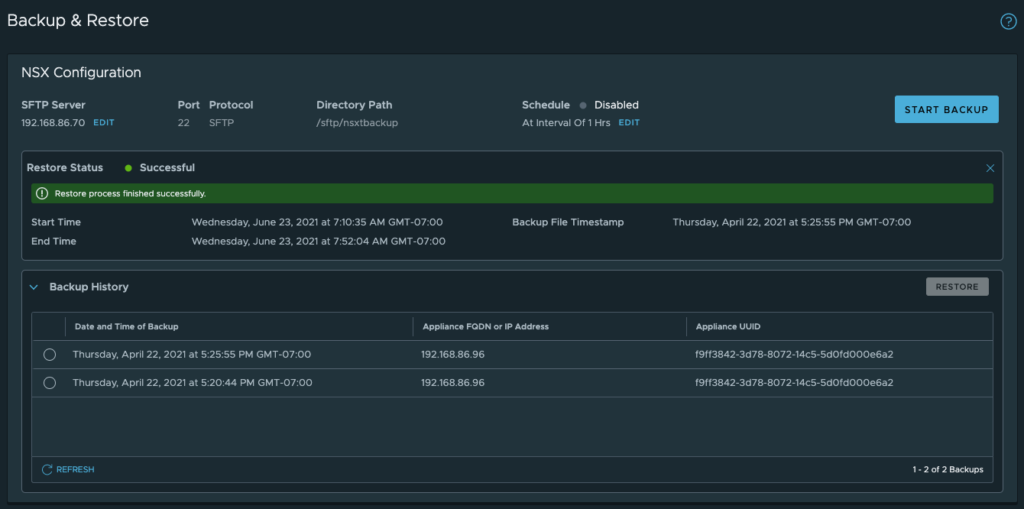
Success
This was the first time I attempted an NSX-T restore from my backup. I’m glad I went through the steps to configure a sftp server to hold my backup on a unique storage device. This was a big time saver. I could have also corrupted my NSX-T configuration backup with the physical switch failure if I had placed the backup on the same NAS NFS server. With my VMware home lab restored I can get back to work on my original goal of deploying HCX.